Loadium Record & Play
Loadium Record & Play

Loadium Record&Play is a feature developed by our team to ease and quicken your load test preparation in terms of scripting. The extension allows you to record URLs, parameters, and custom-headers while you are browsing the site. It is integrated into our test creation process so that you can quickly start your performance tests after finishing the recording.
From installing the extension to starting a test, every detail is covered in this guide in order to quickly get you to your performance tests.
Installing the Extension
You can find the page for installing the extension to Google Chrome here.
After installing the extension, remember to pin it from the extension manager.
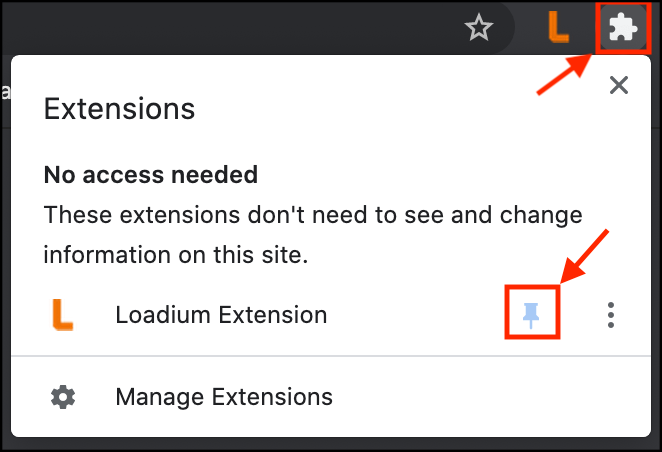
Now you can easily access Loadium Record & Play.
Extension UI
Let’s take a quick tour of the extension’s interface.
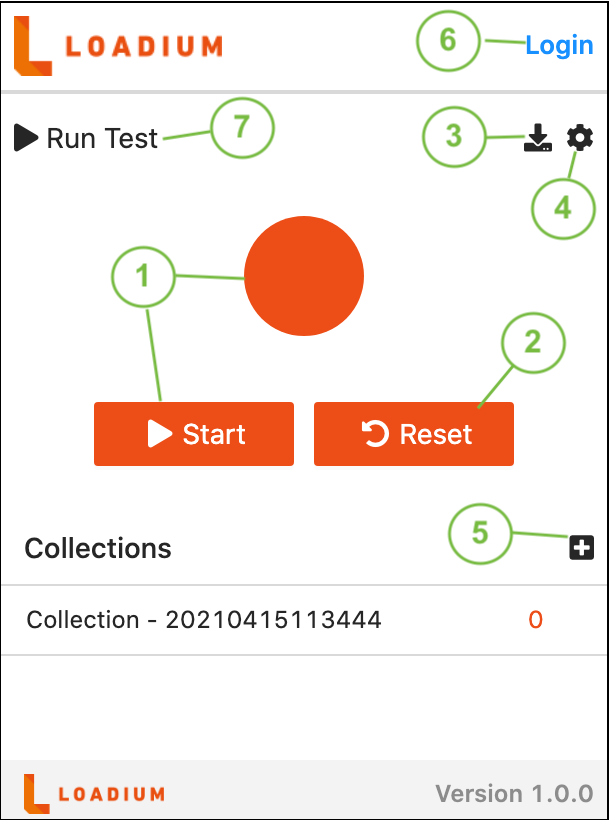
You can find the explanation below for each numbered button:
- These buttons (the start button and the big orange button) will start the recording session, as you browse, it will add requests to the Collections section. Once the recording is started, you will notice that its icon has changed.

2. If you want to clear the recording, you can use this button to wipe the collections you previously recorded.
3. You can download the recording by using this button, as a .json file.
4. Pressing this button will take you to the settings of recording. These settings allow you to filter your recordings. You can define a regex pattern in order to capture specific URLs. For example, entering a pattern as “https://*.youtube.com/*” will record URLs that contains “youtube.com” in them. Furthermore, you can choose to record only the top-level requests or additional sub-level requests.
5. This button will create a new set of collections next to your previous collection, and the new recordings will be added to this new collection.
6. This button will take you to the login page, if you’re logged in you will see your email address here.
7. If you’re logged in, clicking this button will take you to Loadium’s test creation page, where you can edit your recorded collections and test configurations, and then you can start your test.
How to Edit the Recording on Loadium
After clicking the Run Test button from the extension, you will be directed to the New Test page’s Chrome Extension tab.
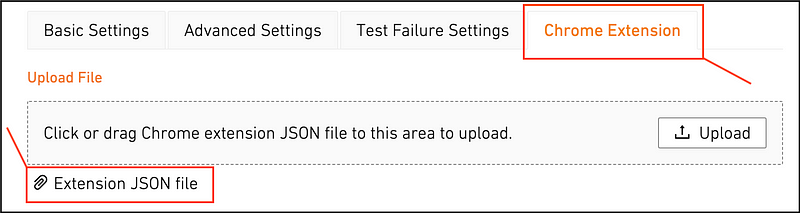
You will find your recorded .json file is automatically uploaded and ready for editing, or you can upload your own json file and edit it. These configurations are exactly same as the Jmeter’s which are very easy to grasp, and it is even easier if you have previous Jmeter experience.
On this page you can:
- Edit your recorded .json file
- Upload your own .json file to edit it
- Configure collection
- Configure a request’s custom-headers, parameters, assertions & variables
- Download the edited file as .json or .jmx (Jmeter) file
- Continue to start a test
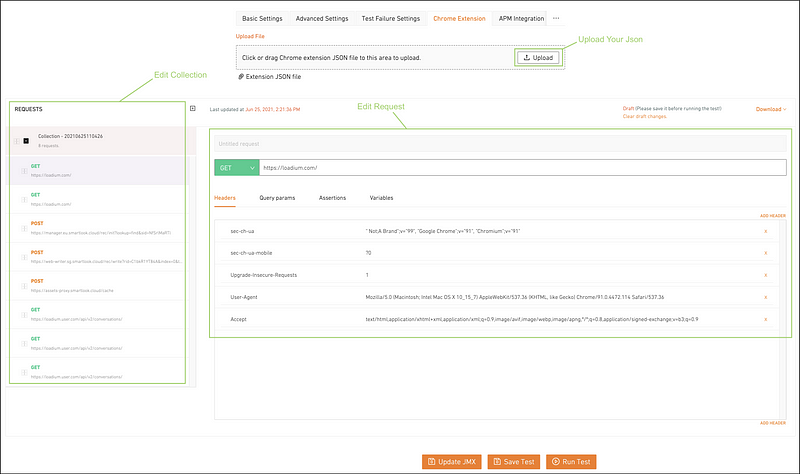
You can upload your own .json file by using the Upload button, but it will overwrite your current work, so it’s better to keep that in mind.
Configuring the Collections
Collections are crucial because they allow you to separate the script into smaller pieces, make it easier to work with, and allow you to focus on a specific part of the script. Similar to the extension’s UI where you can add multiple of them while recording, you can configure them much more deeply on this page.

You can add multiple collections if you want. For each collection, you can:
- Add sleep which adds a delay before the next request. You can enter the delay amount (in milliseconds) as you desire.

- Add a new request which then you can configure its details.
- Delete the collection if you would like to.
For each request in the collection, you can:

- Remove the request from collections
- Clone the request
- Delete the request
You can also move the position of requests by gripping them from the dotted square icon, to change their order or group them in a collection.
Configuring Requests
Method Type
You can change a request’s type GET, POST, PUT, PATCH, DELETE, and OPTIONS.
Headers
You can add a new custom-header or delete the existing ones.
- To delete a custom-header, click on the corresponding “X” button at the end of it.
- To add a new custom-header, click on Add Header button then enter its Key and Value parameters.
Body
Depending on the method type, you can manage its body to send data with the request.
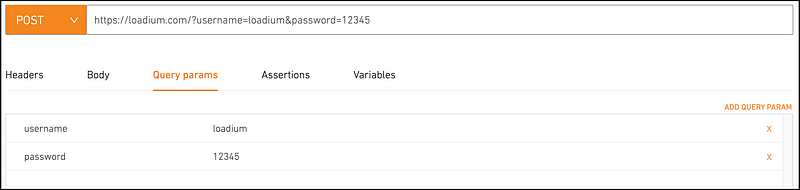
Query Params
You can add query parameters to your request as shown in the picture.
Assertions
You can make various type of assertions that uses response data to check conditions:
- HTTP Status Code assertion, allows you to assert the value of the response code.

- JSON Path value assertion, allows you to capture a value using a JSON path expression, then compare it to the expected result.

- JSON Path assertion asserts that the given JSON path expression contains a value, and is not null.

- Text assertion, allows you to assert the body or the custom-header of response.

Variables
You can create variables that allow you to capture specific data from a request’s response and store it for use later.
There are 3 ways of expression to capture the data to store it in a variable:
- JSON Path
- Regex
- CSS Selector
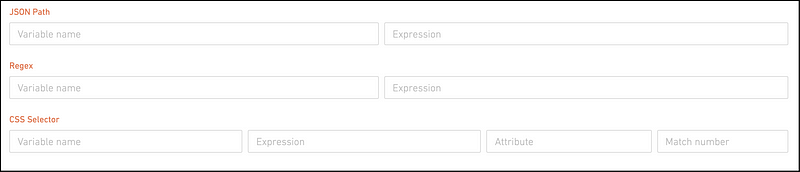
For each type, there are 2 areas to be filled, Variable Name and Expression. The referred data will be stored in the variable.
For CSS Selector, there are 2 additional areas that are related to capturing the data.
- The referenced CSS element might have multiple values, the attribute is for specifying to which value to restore. Leaving it empty will capture the text value of the element.
- The match number is for choosing one outcome if there is more than one reference. Value “0” is used for the random outcomes.
After you create a variable in a request, you will see the created variables in the Available Variables list for the requests coming after.

You can access the created variable’s value with the expression ${variableName}.
After the Edit
At the bottom of the page, you will see 3 buttons.

- Update JMX button allows you to save your changes done on the uploaded file.
Remember to use it frequently to prevent losing your work.
You can also download the file as JMX or JSON file.
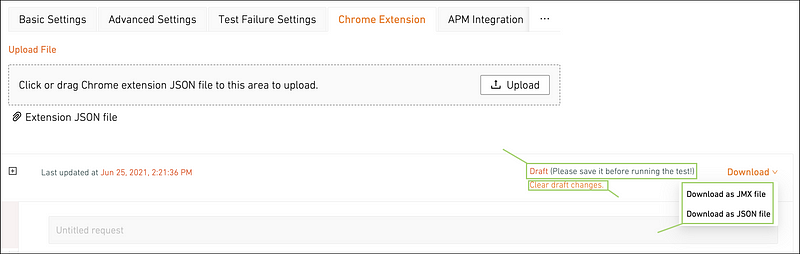
Downloading the file without Updating JMX will download the last saved version of the file. Make sure to click on Update JMX if you want final changes included in the file.
You can also Clear Draft Changes to revert the changes done on the file.
- Save Test button will save the test (after you give it a name in the Basic Settings tab) with the .jmx file in it which can be accessed from the Tests Page for future usage.
Saving the test without Updating JMX will save with the last saved version of the file. Make sure to click on Update JMX if you want final changes included in the file.
- Clicking on Run Test will direct you to the Basic Settings tab on the New Test page with your .jmx file uploaded, ready to run.
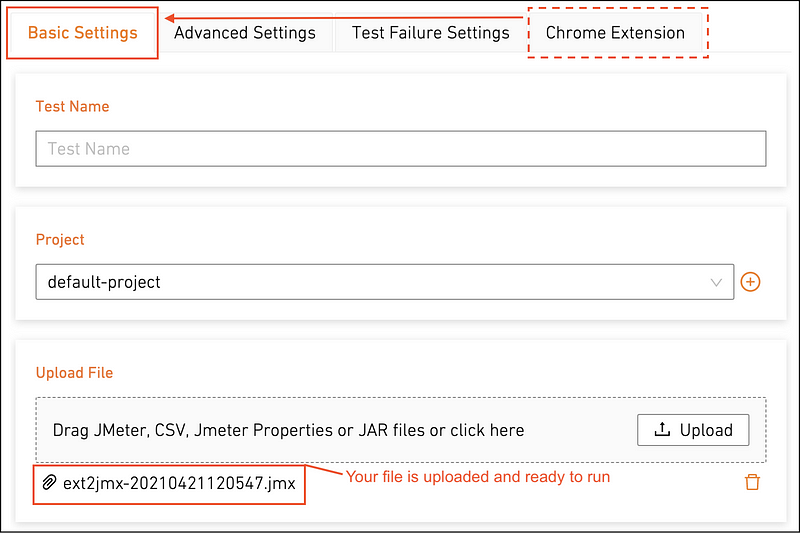
Here you can set your final configurations such as Engine Count, Thread Count, etc. then start your performance test.
Happy load testing!
Find this article helpful? Check out Loadium for more!