Jmeter vs Loadrunner Which Load Testing Tool Should You Choose
3 Ways of Debugging JMeter Scripts
3 Ways of Debugging JMeter Scripts

In case you have worked with JMeter scripts before, you must have stuck at some point and find yourself asking “How do I debug this stuff?”, “Why is my regular expression or jsonpath not working?” Actually, there are many ways to debug JMeter scripts and it’s very easy.
Here are some ways to debug a JMeter script.
1.View Result Tree
JMeter has various listener types. View Result Tree is the one that should be used to debug any request. It allows you to debug Jsonpath, XML or a Regular expression by its user interface. It can be added to your JMeter script through right-click menu: Add > Listener > View Results Tree.
After executing any scripts, you can go into your “View Result Tree” and select the debug type. There are many different types for that.
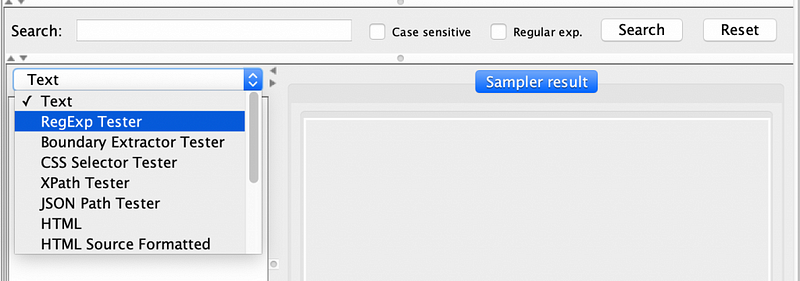
In that screen you see the content of your request, response and sampler itself with the custom-headers, status code etc. Also as default, Debugging option “Text” is selected on the left hand side of the screen. When you open ‘Response Data’ you will be able to search for any textual or numeric value in the response as “Text” is selected.
But you might need to search something from a json or xml response. In those cases, listener allows you to choose “CSS Selector Tester”, “Json Path Tester” or “XML Path Tester”.
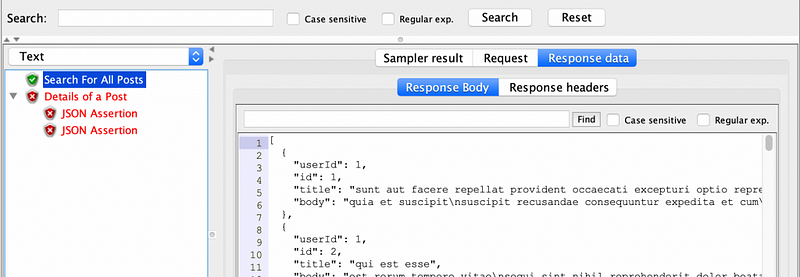
So you can right your queries and validate if they are working fine or not.
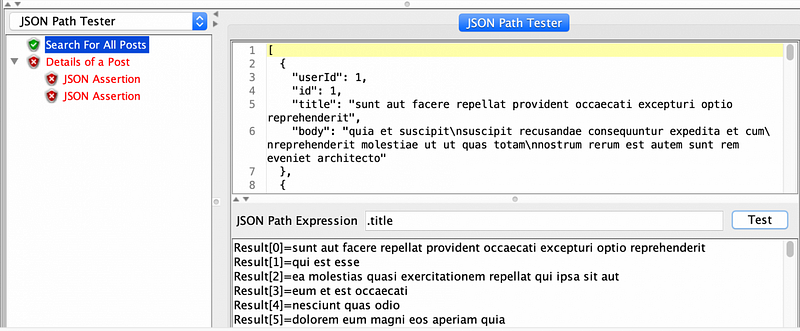
Here’s another example with Regular Expression Tester.

Using that listener is efficient than modifying already existing script and playing once again till you find the right selector or values.
Not: While executing your performance test, don’t forget to disable View Tree Listener as it stores everything in the memory and it will crash your execution by consuming the memory.
2. Log Viewer
JMeter has a console that allows you to monitor the script on runtime. You can turn on the log viewer from the top menu by following “Options->Log Viewer”. So at the bottom of your JMeter client, a panel will open. It will tell you what’s going on with your script.

You can configure the Log level by selecting INFO, WARN, ERROR, DEBUG, TRACE from the top menu.
- DEBUG and TRACE logs everything about the test. Request, response, custom-headers, JMeter status with Threads, etc…
- WARN will log only the warning generated by JMeter.
- INFO will log only Thread status, you will not see any response or request specific data.
- ERROR will only log in case there are any errors caused by test (failing request) or environment (missing CSV file or JDK path etc…)
3. Debug Sampler
Debug Sampler is a very powerful sampler which does nothing but logging. You can log JMeter Properties, JMeter Variables or System Properties. Think about that you have a JDK installation problem in your machine. Debug Sampler tells you. You have many variables that you extract from your request and use in other requests. Debug sampler gathers all of them in one place and show their values.
You can add it by right clicking on your Thread Group and select “Add->Sampler->Debug Sampler”.
Then you configure this sampler for logging level.
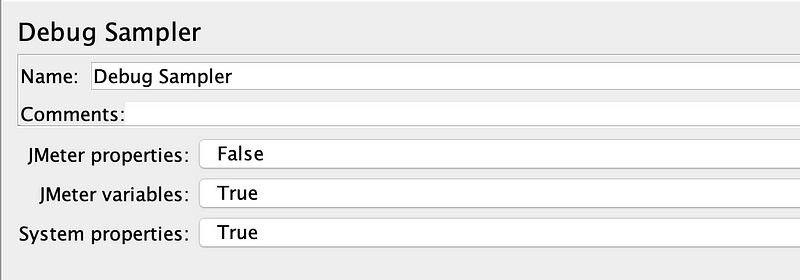
Most important one is to Enable “JMeter Variables” so you’ll be able to monitor any variable create during performance test runtime.
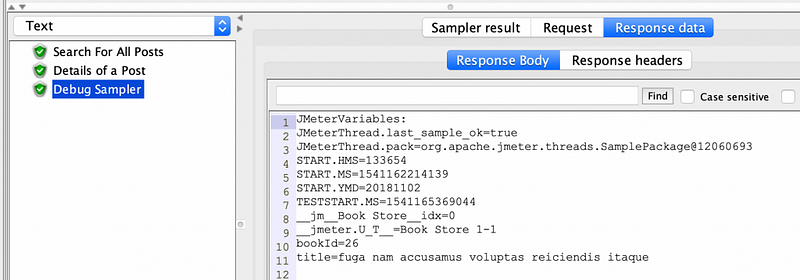
In that picture, there is id and title value which are extracted from a Jsonpath Post Precessor.
Interested in more content about JMeter? Click here to read more!
 10 free test runs with up to 100 concurrent users